| Video Discription |
Are you a brand new streamer looking to enhance your stream with OBS? In this tutorial, we'll walk you through the process of creating scenes, adding custom widgets, and more. Whether you're streaming on Twitch, YouTube, or any other platform, OBS (Open Broadcaster Software) is a powerful tool that can help you elevate your streaming experience.
OBS Studio: https://obsproject.com/download
My Gaming Channel: https://www.youtube.com/@UC9pGVJMV_2qtJwJ0EwdCJHw
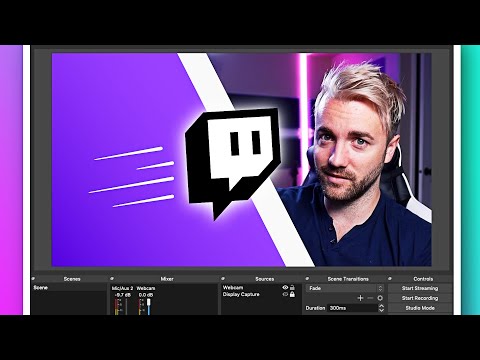
Creating Scenes:
Scenes are the foundation of your stream setup. They allow you to switch between different layouts and setups seamlessly. In OBS, you can create scenes by clicking on the "+" button in the Scenes section. Give your scene a name, and then start adding sources.
Adding Sources:
Sources are the elements that make up your scenes, such as your webcam feed, game capture, overlays, and more. To add a source, click on the "+" button in the Sources section. You can select from a variety of options, including capturing your display, window capture, image, text, and browser sources. Experiment with different sources to create the desired look for your stream.
Customizing Sources:
Once you've added a source, you can customize it to fit your stream's style. Right-click on a source and select "Filters" to apply effects like color correction, crop/resize, or even add a chroma key to remove background color. You can also rearrange sources by dragging and dropping them within the Sources section.
Adding Custom Widgets:
Custom widgets can add an extra layer of interactivity to your stream. You can use browser sources to add widgets like a chat box, follower/subscriber notifications, or a donation goal overlay. There are many widget providers available online, such as Streamlabs, Stream elements, and Muxy. Sign up for an account, customize your widgets, and copy the provided URL into a browser source in OBS.
Configuring Audio:
Audio is a crucial aspect of streaming. In OBS, you can manage your audio sources by clicking on the gear icon in the Audio Mixer section. Here, you can control the volume levels of your microphone, game audio, music, and other sources. Make sure to monitor your audio levels during test streams to ensure a good balance.
Preview and Go Live:
Before going live, make sure to preview your stream. OBS provides a preview mode that allows you to see how your scenes will look before broadcasting to your audience. Take this opportunity to fine-tune your layout, adjust source positions, and test any custom widgets. Once you're satisfied, hit the "Start Streaming" or "Start Recording" button to go live!
Congratulations! You're now equipped with the basics of setting up OBS for your streaming journey. Remember, practice makes perfect, so don't be afraid to experiment and refine your stream setup over time. Good luck and have a fantastic streaming experience!
My Peripherals
Laptop: https://amzn.to/4bowJbj
Keyborad: https://amzn.to/49r9Amz
Mouse: https://amzn.to/3HPkWoX
You can contact me and follow me on:
Linktree : https://linktr.ee/galvanmoto
Instagram : https://www.instagram.com/galvanmoto
Twitter : https://twitter.com/GalvanBhai
GitHub : https://github.com/GalvanMoto
LinkedIn : https://www.linkedin.com/in/galvanmoto
Blogspot : https://techwithgalvan.blogspot.com
#youtube #Tech #new #learn #tutorial #subscribe #like #comment #how #basics #live #obs #gamingvideos #livestream #streamer
Thank you for watching the video!
If you like the video don't to forget to Subscribe, Like, Comment & Share.
[EWJQ5xyXI5c] |