| Video Discription |
Find out how to make salt dough ornaments with our 5 Top Tips to mess-free beautiful salt dough decorations.
Now you know how, find heaps of salt dough inspiration at the Twinkl Crafts Salt Dough Hub Find ► https://www.twinkl.co.uk/l/1fmwms
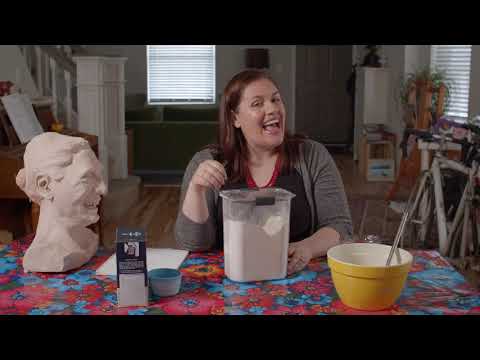
First, measure out 250g of plain flour. Add it to your mixing bowl.
Now, measure 125g of table salt and add it to the mixing bowl. Salt dough is definitely not an edible treat, so you won’t be able to eat these final decorations, even if they are made from dough!
Next we need 125ml of water. Add this a bit at a time, mixing with a spoon. If you find 125ml is not enough, you can go and get more water.
When the spoon just isn’t up to the job, its time to get your hands involved. Try to get all of the salt and flour from the edge of the bowl into the mixture.
I have made my mixture a little too sticky here – you can see it stuck to the side of the bowl – but don’t worry, we can fix that when we are making our salt dough ornaments.
Next we’re going to get our surface ready to work some salt dough. Our first top tip for how to make salt dough ornaments – cover your work surface with freezer paper. Freezer paper has a plastic-covered side which will not stick to the dough. Cut a piece of freezer paper and use tape to stick it to your surface. We love using freezer paper for this because it means less flour scattered on the table and, when you have made all of your salt dough ornaments, you can just fold all of the mess into the paper, scrunch it up in a ball and throw it away.
Take a handful of the salt dough mixture. Top tip number 2 for how to make salt dough ornaments – your salt dough should not stick to your hands or feel sticky at all. To remedy this, dip your salt dough in the spare flour and knead that flour into the mixture. Repeat this until the salt dough mixture does not feel sticky to the touch.
Now we’re ready to roll! If you’re making flat salt dough ornaments, use a rolling pin to roll out your mixture. As our mixture is not sticky, you can see it does not stick to the surface of the rolling pin or the freezer paper. Perfect!
You can now use your cutters to create the salt dough shapes you want. Start at the edge, push your cutter into the dough and give it a wiggle. If you are making circular salt dough ornaments, a cup can also be a handy cutter.
If you want to make a salt dough decoration with a specific shape, and can’t find a cutter for it, don’t worry. Just use cardboard! Top Salt Dough Tip number 3 – create bespoke salt dough templates from cardboard. Find some recycled cardboard and draw the shape you need. Now cut out the cardboard template. Place it on your salt dough and use a cutting tool to cut around. Now remove the template and spend some time neatening up and smoothing the edges of the shape. Done! You can make any salt dough ornament shape you can imagine with this top tip. Remove any excess salt dough from around your cut shapes.
Now, before letting our salt dough dry, we need to add holes for the decoration strings. Top tip number 4 - a straw is perfect for this. Press the straw in, hold for a moment, and then pull out the straw. Most times the dough will come straight out inside the straw. If it doesn’t, go over the hole again and it should remove a neat circle of salt dough.
Now it is time to dry our salt dough. Use the directions in your salt dough recipe, but the general rule is to have your salt dough at a low heat for a longer time. Check your recipe for full details. You can also choose to not bake your salt dough and let it air dry instead. This will take a few days.
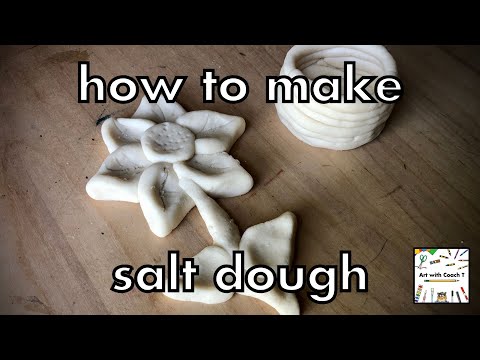
You don’t have to make flat ornaments with salt dough, you can use it much like clay and create 3D characters and shapes too. Combine pieces of salt dough with a firm push and a smooth over the join.
Once the salt dough has baked and cooled, it is time to decorate.
If painting your salt dough, we found it works best if you start with a layer of white! This will give the surface of the salt dough a more even finish and make the final colours more bright. You can keep your freezer paper as a great painting table cover too.
If painting seems a bit much after all this messy fun, you can also choose to colour your salt dough ornaments with felt tip pens and markers. They work just as well and are a quick, mess-free alternative.
Once the layer of white has dried, you can add your bright final colours. Leave to dry.
Our final – and fifth – top tip for making salt dough ornaments – add a layer of clear-drying glue to the final decoration to give it a final varnish effect. If you have used felt tip pens to decorate your salt dough ornament, use less clear-drying glue as it can make the colours run.
Now, fold up your freezer paper with all of that mess in and throw it away. Done!
You can find all of our beautiful Twinkl Crafts content at our landing page ► https://www.twinkl.co.uk/l/jih9l
[mGUUqD2z4Rs] |